Thumbprint Cookies
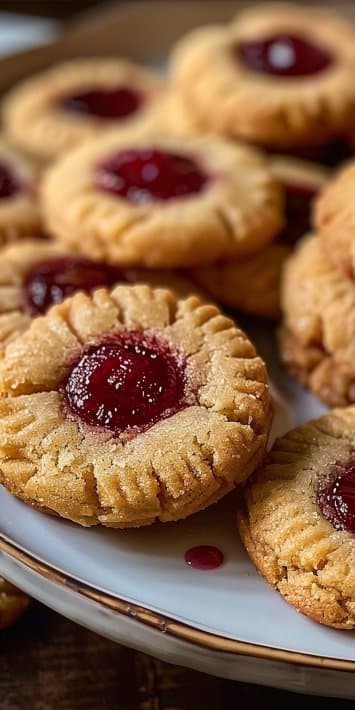
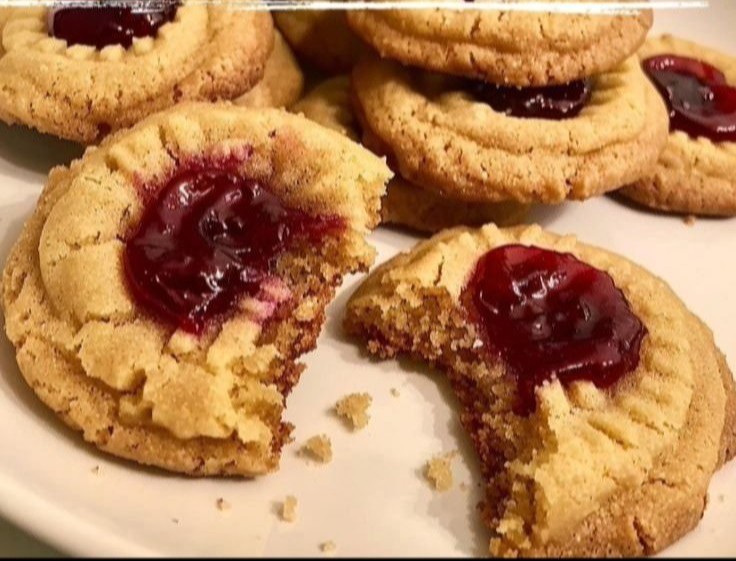
Thumbprint Cookies: 7 Sweet Variations to Delight You
So you’re craving something tasty but too lazy to spend forever in the kitchen, huh? Same. I hear you. Thumbprint cookies are basically the love child of cookies and jam, and they come together in no time at all. Plus, you get to make cute little indents to hold all that glorious jam. So let’s roll up those sleeves, grab our favorite jam, and dive into the delightful world of thumbprint cookies. Trust me, your taste buds will thank you.
Why This Recipe is Awesome
Why should you whip these bad boys up? Well, first of all, it’s idiot-proof, even I didn’t mess it up. You don’t need to be a pastry chef to make these. If you can mix ingredients and press your thumb into dough, you can totally nail this recipe. Plus, they are ridiculously customizable. You can toss in whatever jam or filling that strikes your fancy. Feeling peachy? Shoot for peach jam. Want to celebrate your inner raspberry lover? Go for raspberry. This recipe is practically begging for creativity, and really, who doesn’t love a cookie that lets you express yourself, right?
Ingredients You’ll Need
Here’s the shopping list. No need for anything exotic. Just good ol’ stuff that you probably already have in your kitchen. Grab these:
- 1 cup unsalted butter, softened (Seriously, don’t use hard butter; it’ll just lead to heartache)
- 1/2 cup granulated sugar (Sweet things deserve sweet treats)
- 1/2 cup brown sugar, packed (Because life is better with a little molasses action)
- 1 teaspoon vanilla extract (Vanilla: the spice of life)
- 2 cups all-purpose flour (Just flour, nothing more, nothing less)
- 1/2 teaspoon salt (A pinch of salt makes everything nice)
- 1 cup fruit jam of your choice (Go wild; the jam aisle is your playground)
Step-by-Step Instructions
Ready to get baking? Here’s how to whip up those delightful thumbprint cookies. Just follow these steps, and you’ll be golden!
- Preheat your oven to 350°F (175°C) – You don’t want to bake cold cookies. That’s a rookie mistake.
- In a bowl, cream the butter and sugars together – Get in there and mix it up until it’s fluffy and ready to party.
- Add vanilla extract and mix well – Because, seriously, vanilla makes everything better.
- Gradually add flour and salt, mixing until combined – You’re looking for a dough that’s soft but not sticky.
- Shape the dough into small balls and place them on a baking sheet – Not too big, not too small; think golf ball size.
- Make an indent in the center of each ball using your thumb – This is where the magic (and jam) will happen.
- Fill each indent with jam – Go on, be generous. Nobody likes a dry thumbprint.
- Bake for 12-15 minutes or until edges are lightly golden – You want them to look cute and golden, not like they’ve been toasting in the sun too long.
- Let cookies cool on the baking sheet for a few minutes before transferring to a wire rack – Patience is key. No one likes burnt tongues.
Common Mistakes to Avoid
So you’ve got a cookie plan, but hold up. Before you dive in headfirst, let’s avoid some classic slip-ups:
- Thinking you don’t need to preheat the oven – Rookie mistake. Cold dough in a cold oven leads to sad cookies.
- Using cold butter – Just don’t. This will turn your cookies into a greasy nightmare.
- Overfilling the indents – Sure, it’s tempting to go wild with the jam, but too much can lead to leaking. Easy does it.
- Not letting them cool – You want delicious cookies, not molten lava on your fingertips. Give them a sec.
Alternatives & Substitutions
Not feeling the traditional jam vibe? No problemo. Check out these cool alternatives that’ll still keep your thumbprint cookies fabulous:
- Nut butter instead of jam – Go for almond or peanut butter. It’s like a fancy PB&J on steroids.
- Chocolate ganache – Want to impress? This decadent option will take your cookies to a whole new level. Trust me, it’s a game changer.
- Coconut flakes – Mix shredded coconut into your thumbprint for a tropical twist.
- Flavored extracts – Want to change things up? Add a dash of almond or mint extract to elevate the flavor profile.
FAQ (Frequently Asked Questions)
Got questions? I got answers, friend. Read on.
Can I use margarine instead of butter? Well, technically yes, but why hurt your soul like that? Butter is where the flavor party is at.
How long do these cookies last? If they last that long in your house, about a week in an airtight container. But I’ve seen them disappear way faster.
Can I freeze the dough? Absolutely. Just make sure to wrap it tightly. You’ll have baked happiness on demand.
Is there a gluten-free option? Yup! Use a gluten-free flour blend and pray that it works out. Spoiler alert: it usually does!
Can I use store-bought jam? Why yes, you can. But making your own jam definitely ups your baking street cred.
What if I don’t want to shape them into balls? Go wild. Just spread the dough in a cake pan, press it down, and go crazy with your jam. Whatever floats your cookie boat.
Final Thoughts
Now go impress someone—or yourself—with your new culinary skills. You’ve earned it. Bake these glorious thumbprint cookies and share some with your friends, or keep them all to yourself. No judgment here. Just remember, the world is a better place with cookies in it, and a cookie made with love changes everything. So get out there and show those thumbprint cookies who’s boss. Happy baking, my friend!
Print
Thumbprint Cookies
- Total Time: 30 minutes
- Yield: 24 cookies
- Diet: Vegetarian
Description
Delicious thumbprint cookies that are easy to make and customizable with your favorite jam.
Ingredients
- 1 cup unsalted butter, softened
- 1/2 cup granulated sugar
- 1/2 cup brown sugar, packed
- 1 teaspoon vanilla extract
- 2 cups all-purpose flour
- 1/2 teaspoon salt
- 1 cup fruit jam of your choice
Instructions
- Preheat your oven to 350°F (175°C).
- Cream the butter and sugars together until fluffy.
- Add vanilla extract and mix well.
- Gradually add flour and salt, mixing until combined.
- Shape the dough into small balls and place them on a baking sheet.
- Make an indent in the center of each ball using your thumb.
- Fill each indent with jam.
- Bake for 12-15 minutes or until edges are lightly golden.
- Let cookies cool on the baking sheet for a few minutes before transferring to a wire rack.
Notes
Avoid using cold butter to ensure the best texture, and allow cookies to cool before handling.
- Prep Time: 15 minutes
- Cook Time: 15 minutes
- Category: Dessert
- Method: Baking
- Cuisine: American