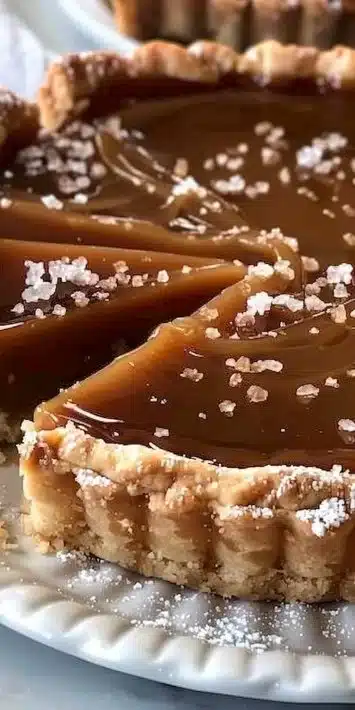
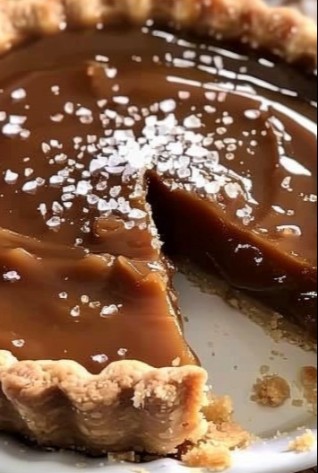
Salted caramel tart
Salted Caramel Tart: 7 Steps to Pure Bliss
For anyone with a sweet tooth, there’s a certain gastronomic paradise that awaits when it comes to desserts, and the salted caramel tart is a delicious ticket into that realm. Wrapped in a buttery crust, the brilliant melding of flavors from sweet caramel, a hint of sea salt, and the delicate tart base creates a blissful experience that sings to the senses. This recipe boasts brilliance in its simplicity, making it an approachable delight that can transform any occasion into something special.
Why Make This Recipe
- It combines a rich buttery tart shell with a sweet yet salty caramel that is simply irresistible.
- A balance of textures and flavors that both enchants and indulges, making it perfect for any dessert lover.
- This salted caramel tart is a stunning centerpiece for gatherings and celebrations, leaving your guests in awe and asking for seconds.
Easy Method for Salted Caramel Tart
Making a salted caramel tart at home may sound indulgent and complicated, but it can actually be quite simple. Here’s how to bring this gourmet treat to life, step by step, ensuring that every aspect is covered.
Step 1: Preheat the Oven
First things first, set your oven to preheat at 350°F (175°C). This ensures your tart shell has the perfect baking temperature ready to go as soon as it’s prepped.
Step 2: Prepare the Tart Crust
In a bowl, combine the all-purpose flour, softened unsalted butter, powdered sugar, and a touch of salt. As you mix these ingredients, you’ll want to achieve a crumbly yet cohesive texture. The goal here is to create a dough that will hold its shape when pressed into a tart pan.
Step 3: Shape the Tart
Take the mixture from the bowl and press it evenly into the tart pan. The crust should be about a quarter-inch thick to ensure it holds the decadent filling that’s to come. Once shaped, it’s ready for the oven.
Step 4: Bake the Tart Shell
Slide the tart pan into the preheated oven and allow it to bake for about 15 minutes, or until it turns a beautiful golden brown. This step brings out the buttery goodness and helps develop a perfectly crispy shell.
Step 5: Make the Caramel
While the crust is baking, it’s time to make the luscious salted caramel filling. In a saucepan, combine granulated sugar, water, and light corn syrup. Heat this mixture over medium heat, stirring occasionally. Watch as it transforms and deepens in color to an amber hue. This is where the magic happens, but be careful not to let it get too dark, or it could turn bitter.
Step 6: Add Cream and Sea Salt
Once your mixture reaches that gorgeous amber shade, carefully remove it from the heat. This is the moment to add in the heavy cream and sea salt. The interaction between the hot caramel and the cream might create steam—so be cautious. Stir the mixture until it’s velvety smooth, then add in the vanilla extract, enhancing the flavor profile.
Step 7: Pour and Cool
Finally, pour the decadent caramel into the baked tart shell. Make sure it’s evenly distributed, and then let the tart cool completely to allow the flavors to meld and set beautifully. This could take about an hour or so, and it’s well worth the wait.
Storage Tips for Salted Caramel Tart
To keep your salted caramel tart fresh and delicious, follow these guidelines:
- Refrigerate: Store the tart in an airtight container in the refrigerator for up to 3–4 days at 40°F (4°C). This allows the flavors to develop further while keeping the caramel lovely and firm.
- Freeze: If you’re making the tart ahead of time, wrap it tightly in plastic wrap and aluminum foil. It can be frozen for up to 2 months. Just thaw it in the refrigerator when you’re ready to enjoy it!
- Room Temperature: If you plan to serve the tart the same day, keeping it covered at room temperature for a few hours will keep it nice and delightful.
Serving Suggestions for Salted Caramel Tart
When it comes to serving your salted caramel tart, the options are as creative and enticing as the dessert itself. Here are a few suggestions to elevate your serving experience:
- Garnish with Whipped Cream: A dollop of lightly sweetened whipped cream on top gives a light contrast that pairs wonderfully with the richness of the tart.
- Pair with Ice Cream: Serve slices of the tart alongside a scoop of vanilla or sea salt ice cream. The combination of warm and cold creates an unforgettable sensation.
- Drizzle with Chocolate Sauce: For chocolate lovers, a drizzling of warm chocolate sauce over the caramel can elevate each bite to pure indulgence.
- Fresh Fruits: Adding fresh fruits like berries or slices of pear adds a layer of freshness and balances the sweetness beautifully.
Tips to Make Salted Caramel Tart
- Be precise with sugar cooking times. If you’re unsure, it’s always better to undercook slightly than to overcook and lose that exquisite flavor.
- Use a good quality sea salt. The type of salt you choose can enhance the overall flavor significantly, so opt for a flaky texture rather than granules.
- Let the tart cool completely before slicing. This way, you achieve clean slices that will delight you and your guests.
Variations or Substitutions
If you’re looking to shake things up a bit with your salted caramel tart, consider these variations:
- Nutty Crust: Instead of a plain tart crust, finely chop nuts like pecans or hazelnuts and incorporate them into your dough for added texture and flavor.
- Chocolate Caramel Tart: For a chocolate twist, add cocoa powder to your tart crust or fold in some melted chocolate into your caramel before pouring it into the shell.
FAQs
Q: Can I make this ahead of time?
A: Absolutely! You can prepare the tart a day or two in advance. Just store it in the fridge to keep it fresh.
Q: How do I get a clean slice?
A: Use a sharp knife dipped in hot water and wiped dry before cutting. This helps the knife glide through the caramel without pulling it apart.
Q: Can I use a store-bought crust?
A: Yes, using a pre-made tart crust can save time. Just be sure to fill it with the salted caramel once it’s fully baked.
Q: How do I keep the tart from getting soggy?
- Bake the tart shell thoroughly to ensure it’s cooked through.
- Try brushing the inside with a thin layer of melted chocolate before adding the caramel; this can create a barrier against moisture.
Creating a salted caramel tart is more than just following a recipe; it’s about immersing yourself in the joys of baking and savoring. Each step brings a sense of accomplishment, culminating in a tart that is both visually stunning and utterly delicious. With each bite, the interplay of flavors will take you on an unforgettable journey, making this delightful dessert a cherished mainstay at your table. So gather your ingredients, invite some friends or family over, and take this blissful plunge into the world of salted caramel tarts!
Print
Salted Caramel Tart
- Total Time: 45 minutes
- Yield: 8 servings
- Diet: Vegetarian
Description
A deliciously rich and creamy salted caramel tart wrapped in a buttery crust, perfect for any dessert lover.
Ingredients
- 1 ¼ cups all-purpose flour
- ½ cup unsalted butter, softened
- ¼ cup powdered sugar
- ¼ teaspoon salt
- 1 cup granulated sugar
- ¼ cup water
- ¼ cup light corn syrup
- ¾ cup heavy cream
- 1 teaspoon sea salt
- 1 teaspoon vanilla extract
Instructions
- Preheat the oven to 350°F (175°C).
- In a bowl, combine the flour, butter, powdered sugar, and salt to form a dough.
- Press the mixture evenly into a tart pan, about ¼ inch thick.
- Bake the tart shell for about 15 minutes or until golden brown.
- In a saucepan, heat sugar, water, and corn syrup over medium heat until it turns amber.
- Remove from heat, then stir in heavy cream and sea salt until smooth, followed by vanilla extract.
- Pour the caramel into the baked tart shell and let it cool completely.
Notes
For best flavor, let the tart cool completely before serving. Garnish with whipped cream or fresh fruits for an added touch.
- Prep Time: 15 minutes
- Cook Time: 30 minutes
- Category: Dessert
- Method: Baking
- Cuisine: American