Garlic Butter Chicken Skillet: 5 Steps to Pure Bliss
Garlic Butter Chicken Skillet: 5 Steps to Pure Bliss
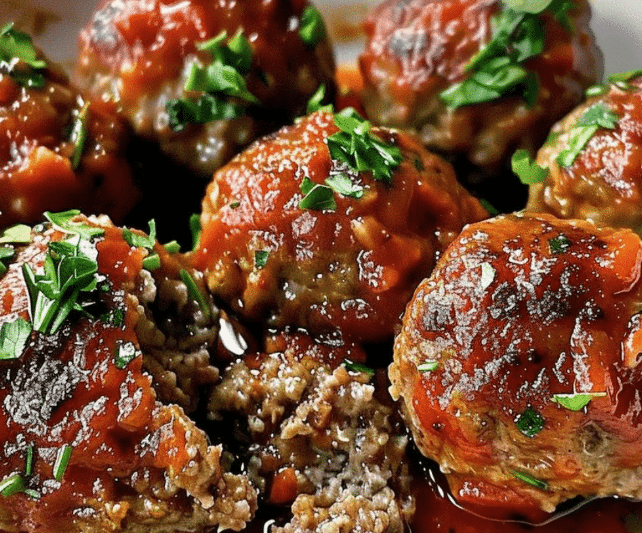
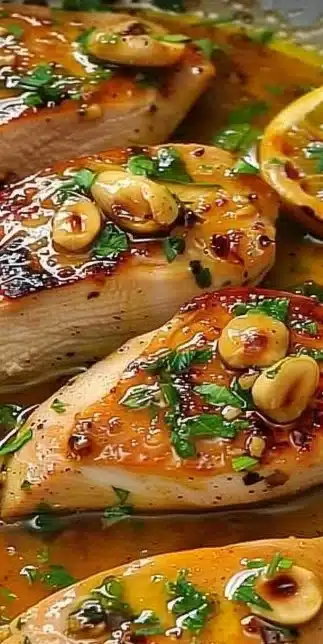
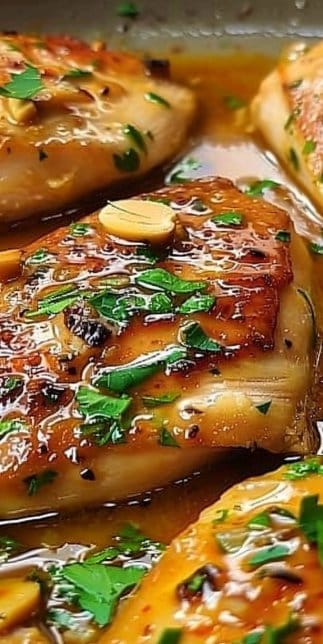
There is something deeply comforting about a skillet dinner that fills the kitchen with sizzling garlic and butter. This garlic butter chicken skillet hits that sweet spot between fast and luxurious, delivering golden seared chicken with an aromatic garlic finish that feels like a hug on a plate. If you like bold, simple flavors you can make any night of the week, you are in for a real treat and a dependable weeknight winner. For a different take that pairs potatoes and chicken in the same pan check out this garlic butter chicken and potatoes recipe
Why Make This Recipe
This dish wins on several fronts
- It is fast to prepare and needs only a handful of pantry staples
- The garlic and butter team up to create a rich, restaurant style sauce without fuss
- Perfect for weeknight dinners yet elegant enough for company
Step-by-Step Guide to Making Garlic Butter Chicken Skillet
Getting great results is about technique as much as ingredients. Below is a clear walkthrough with sensory cues so you can nail the texture and flavor every time. I will walk you through prepping the chicken, searing to golden perfection, finishing with garlic, and plating so the herbs and butter look their best.
-
Prepare your mise en place
Wash and pat dry the chicken breasts. Dry skin equals better browning, so take an extra minute to use paper towels. If the breasts are unevenly thick, give them a gentle pound between plastic wrap or in a zip top bag using the flat side of a meat mallet until they are about the same thickness. Even thickness ensures even cooking. -
Season with confidence
Sprinkle salt, pepper, and paprika over both sides of the chicken. The paprika gives visual warmth and a subtle smoky sweet note. Seasoning early helps build flavor into the meat itself rather than only on the surface. -
Heat the skillet and melt the butter
Choose a heavy bottom skillet or cast iron for even heat retention. Warm the pan over medium heat until it is hot but not smoking. Add the butter and let it melt fully. Once it foams slightly the pan is ready. That small foam and nutty aroma from the butter tells you the pan is at a good temperature for searing. -
Sear the chicken to a golden crust
Add the chicken to the skillet and leave it undisturbed. Resist the urge to move it around. Let the first side develop a deep golden brown. That caramelized crust locks in juices. After about 5 to 7 minutes, flip the pieces and repeat until both sides are golden and the chicken reaches an internal temperature near 160 to 165 degrees Fahrenheit. Use a meat thermometer for accuracy, but if you do not have one, look for clear juices and a firm but slightly springy texture. -
Add finishing garlic and herbs
Lower the heat slightly, push the chicken to the side if you have space, and add minced garlic into the butter left in the pan. Garlic cooks quickly and will go from fragrant to bitter in seconds, so stir it for only about one to two minutes. Spoon some of the buttery garlic pan juices over the chicken as it finishes. Remove the skillet from heat and garnish with chopped fresh parsley. The green herb brightens the dish and adds a fresh contrast to the rich butter. -
Rest briefly and serve
Let the chicken rest for a few minutes after removing it from the skillet. Resting redistributes the juices so each bite is succulent. Slice against the grain for the most tender mouthfeel, or serve the breasts whole with the buttery garlic sauce spooned over the top.
A few cooking notes
- Use unsalted or salted butter depending on how much salt you added earlier
- If you want more sauce, add a splash of chicken broth or white wine after searing and reduce for a minute to concentrate flavor
- Keep an eye on the garlic so it does not brown too much and become bitter
Ingredients
4 chicken breasts
4 tablespoons butter
6 cloves garlic, minced
1 teaspoon paprika
Salt and pepper to taste
Fresh parsley, chopped for garnish
Directions
Season chicken breasts with salt, pepper, and paprika.
Melt butter in a skillet over medium heat.
Add chicken to the skillet and cook for 5-7 minutes per side until golden brown.
Add garlic and cook for an additional 1-2 minutes.
Remove from heat and garnish with fresh parsley.
Storing Leftover Garlic Butter Chicken Skillet
Storing cooked chicken properly keeps it safe and tasty for future meals
- Refrigerate in airtight containers for 3 to 4 days at 40 degrees Fahrenheit or lower
- Freeze in freezer safe containers or heavy duty freezer bags for up to 2 months at 0 degrees Fahrenheit
- To thaw frozen chicken, transfer to the refrigerator overnight or use the defrost setting on a microwave for quick thawing
- Reheat gently on low heat in a skillet with a splash of water or broth to rehydrate and preserve juiciness, or warm in the oven at 325 degrees Fahrenheit until heated through
- When reheating from frozen, it is best to thaw first to ensure even warming and to prevent overcooking the exterior
Serving Ideas for Garlic Butter Chicken Skillet
This chicken is a versatile base so think beyond a single plate
-
Classic pairing
Serve with buttery mashed potatoes and steamed green beans for a cozy plate that lets the chicken shine. Spoon the pan juices over the mash for a heady garlic butter boost. -
Light and bright
Lay the sliced chicken over a bed of mixed greens, cherry tomatoes, cucumber, and a light lemon vinaigrette. The richness of the chicken is balanced by the acidity in the dressing. -
Family friendly
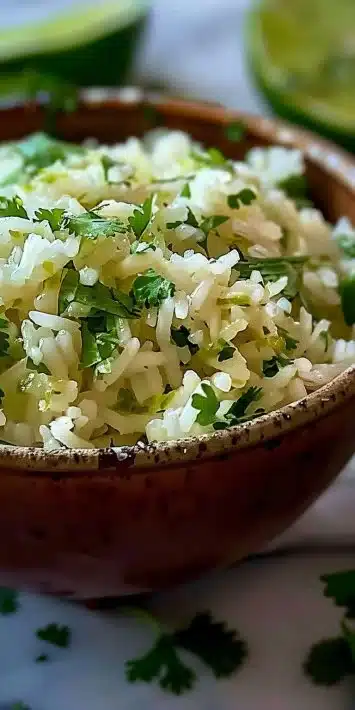
Serve with rice or egg noodles and a side of roasted carrots and peas. Kids tend to love the simple flavors and the tender texture. -
Elevated dinner
Plate the chicken alongside risotto or polenta and finish with a shower of grated Parmesan and a few lemon zest shavings. The tang of citrus lifts the richness of the butter. -
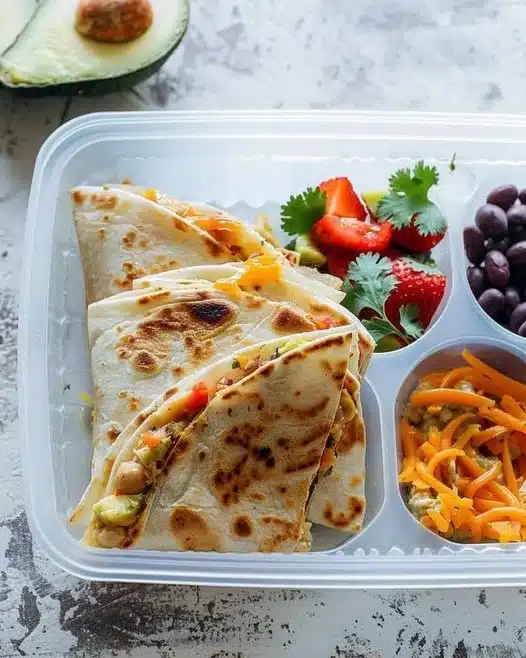
Sandwich or wrap
Thinly slice the chicken and tuck into warm tortillas with fresh arugula, sliced avocado, and a drizzle of plain yogurt or mayonnaise thinly mixed with lemon juice. This makes a great lunch box option.
Tips to Make Garlic Butter Chicken Skillet
Q How do I keep the chicken moist and tender
A Use an instant read thermometer and remove the chicken from heat when it reaches 160 degrees Fahrenheit then rest it to finish cooking to safe temperature. Resting is the trick to juicy meat
Q What if my chicken is too thick and takes longer to cook
A Flatten thicker breasts to even thickness before seasoning. Alternately, sear and then finish in a 350 degrees Fahrenheit oven for 6 to 10 minutes depending on thickness
Q Can I use less butter and still get good flavor
A Yes reduce to 2 tablespoons and add a little olive oil for extra searing fat. You will miss some richness but the garlic flavor will still come through strongly
Variations and Substitutions
-
Swap the chicken
If you prefer dark meat, boneless skinless chicken thighs work beautifully. Thighs have more fat and stay moist even when cooked a bit longer. Adjust cooking times accordingly and watch for a richer, slightly more intense flavor. -
Add citrus and herbs
Stir in a tablespoon of lemon juice after adding the garlic and finish with lemon zest for a bright note. Tarragon, thyme, or rosemary can replace parsley for different herbaceous profiles. -
Make it creamier
After searing and cooking the garlic, lower the heat and stir in a splash of cream or a spoonful of cream cheese for a silky sauce. A pinch of Dijon mustard will add depth.
Common mistakes to avoid
-
Crowding the pan
If you try to fit too many chicken breasts into the skillet they will steam instead of sear. Work in batches if necessary to maintain a golden crust. -
Burning the garlic
Garlic browns quickly. Add it after the chicken has mostly cooked and keep it moving in the pan to prevent bitterness. -
Skipping the rest
Cutting the chicken immediately when it comes off the heat will release the juices. Let it rest for a few minutes covered loosely with foil to keep it warm and juicy.
Nutritional thoughts and simple swaps
This recipe is naturally moderate in calories and rich in flavor thanks to the butter. For a lighter version swap half the butter for olive oil, or use a plant based butter substitute. Pair with high fiber sides like roasted Brussels sprouts or a quinoa salad to make it a balanced meal that keeps you full longer.
Make ahead and meal prep strategies
If you want to use this recipe for meal prep, cook the chicken as instructed and slice it once partially cooled. Store slices in single portion containers with a small amount of the pan juices to keep them moist. Use these portions across grain bowls, salads, or wraps throughout the week. You can also double the recipe and freeze portions for quick reheats on busy nights.
Flavor layering that matters
The success of this dish hinges on how you layer simple flavors
- Salt early and taste as you go
- Let the paprika brown slightly on the meat to develop sweetness
- Use fresh garlic for the brightest flavor. Pre minced jars are convenient but can be mellow compared to fresh
How to salvage a too salty pan sauce
If you or your pantry made the sauce too salty
- Add a splash of water or low sodium chicken broth and simmer briefly to dilute
- A small squeeze of lemon or a pinch of sugar can rebalance flavors
- Potatoes or a simple side like rice will help absorb and balance saltiness on the plate
Pairing wines and beverages
This dish pairs well with a chilled Sauvignon Blanc for a crisp citrus contrast or an unoaked Chardonnay to match the buttery notes. If you prefer red wine, try a light Pinot Noir. For non alcoholic options consider sparkling water with lemon or a cold herbal iced tea.
Quick troubleshooting guide
- If the chicken seems undercooked in the center after searing, finish in a preheated oven at 350 degrees Fahrenheit for a few minutes until it reaches the proper temperature
- If the garlic is bitter, discard the garlic bits and add fresh garlic, cooking for a shorter time, and reduce heat slightly
- If the crust is not forming, make sure the pan is hot and the chicken is dry before it hits the butter
Frequently asked questions
Q Can I make this ahead and reheat successfully
A Yes. Cook and cool the chicken, then refrigerate for up to 4 days. Reheat gently in a skillet with a little broth or in an oven set to 325 degrees Fahrenheit until warmed through
Q What about using bone in chicken breasts or thighs
A Bone in chicken will take longer to cook. Sear as usual then finish in a 375 degrees Fahrenheit oven for 20 to 30 minutes, depending on size, until the internal temperature reaches 165 degrees Fahrenheit near the bone
Q How can I make it spicier without overpowering the garlic
A Add a pinch of red pepper flakes when you add the garlic or mix in a teaspoon of smoked paprika for subtle heat. You can also serve hot sauce on the side for those who want more kick
Q Is there a vegetarian version of this skillet
A Yes use thick slices of cauliflower steaks or large portobello mushrooms seasoned the same way and seared until golden. Finish with garlic butter or a vegan butter alternative
Q How do I know when the chicken is done without a thermometer
A Look for clear juices running when you pierce the thickest part, and a firm but slightly springy texture. The meat should not be raw pink inside. For best accuracy use a thermometer
Additions to elevate the meal
- Keep a small pan of toasted breadcrumbs or panko mixed with a little melted butter and fresh herbs to sprinkle on top for crunch
- Finish with a few capers tossed in at the end for a briny pop
- Add a handful of cherry tomatoes to the skillet during the last few minutes to create a quick blistered tomato accompaniment
Make it part of a larger menu
If you are serving guests, pair the chicken with a starter of roasted beet salad or a simple soup like carrot ginger. End the meal with a light lemon tart or vanilla poached pears to continue the balance of richness, brightness, and fresh herbs.
Pro tips for consistent outcomes
- Use a heavy skillet to maintain stable heat
- Dry chicken well for the crispiest sear
- Cook in batches if needed and hold in a low oven set to 200 degrees Fahrenheit to keep warm without overcooking
Kitchen tools that help
- Instant read thermometer for precision
- Heavy skillet or cast iron for even browning
- Garlic press or fine mince for quick aromatic garlic
- Tongs for safe flipping and handling of hot chicken
Creative leftovers ideas
- Chop the chicken and use in a creamy pasta with peas and lemon
- Make a warm grain bowl with farro, roasted vegetables, and sliced chicken
- Dice and fold into an egg scramble for a protein rich breakfast
Final touches that make a difference
A bright squeeze of lemon just before serving lifts the buttery notes. Fresh herbs like parsley or chives add color and a clean herbal finish. For an extra glossy look spoon some of the warm pan butter over the sliced chicken right before you plate.
Conclusion
Bring a little restaurant style to your home kitchen with this simple technique for golden seared chicken finished in garlic butter. For a luxurious sauce idea to pair with your chicken try the Roasted Garlic Cream Sauce recipe found here a lovely complement that is rich and velvety and easy to make
Roasted Garlic Cream Sauce | Rich, Velvety & Easy to Make …
Enjoy the process and remember small steps like proper seasoning, a hot skillet, and careful garlic timing are the difference between good and unforgettable.
Print
Garlic Butter Chicken Skillet
- Total Time: 30 minutes
- Yield: 4 servings
- Diet: Gluten-Free
Description
A comforting skillet dinner featuring golden seared chicken in a rich garlic butter sauce, perfect for weeknight meals or special occasions.
Ingredients
- 4 chicken breasts
- 4 tablespoons butter
- 6 cloves garlic, minced
- 1 teaspoon paprika
- Salt and pepper to taste
- Fresh parsley, chopped for garnish
Instructions
- Season chicken breasts with salt, pepper, and paprika.
- Melt butter in a skillet over medium heat.
- Add chicken to the skillet and cook for 5-7 minutes per side until golden brown.
- Add garlic and cook for an additional 1-2 minutes.
- Remove from heat and garnish with fresh parsley.
Notes
Use unsalted or salted butter depending on your seasoning preference. For more sauce, add a splash of chicken broth or white wine after searing.
- Prep Time: 15 minutes
- Cook Time: 15 minutes
- Category: Main Course
- Method: Searing
- Cuisine: American