Crispy Oven Chicken Tenders: 9 Reasons You’ll Love Them
Crispy Oven Chicken Tenders: 9 Reasons You’ll Love Them
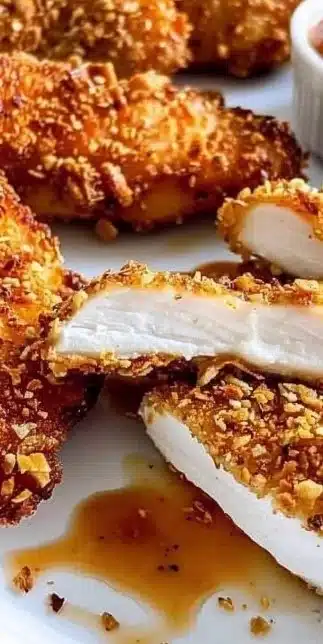
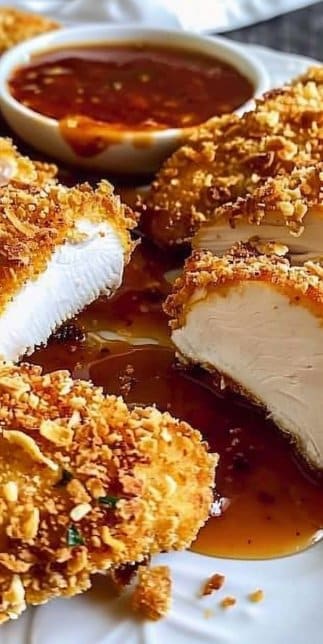
There is something wonderfully comforting about golden, crunchy chicken tenders fresh from the oven. These are the kind of tenders that satisfy picky eaters, make weeknight dinners feel special, and travel beautifully as lunch or snack. Quick to assemble, easy to bake, and endlessly adaptable, this recipe earns its place in the regular rotation.
Why Make This Recipe
If you are tired of greasy takeout and complicated breading techniques, this recipe is here to rescue your dinner routine. It gives you the crisp texture you crave without deep frying, uses pantry-friendly ingredients, and bakes in under half an hour for a fast, satisfying meal. Best of all, the seasoning is simple yet flavorful so the chicken shines.
Step-by-Step Guide to Making Crispy Oven Chicken Tenders
Preparing these tenders is straightforward, but a few simple habits will lift the results from good to irresistible. The clear steps below will walk you through setup, breading, baking, and serving so each piece comes out golden with a tender, juicy interior.
1 Gather your ingredients and organize your workspace
- Give yourself a clean surface, three shallow bowls for the breading station, and a rimmed baking sheet lined with parchment for easy cleanup.
- If the chicken breasts are thick, slice them into even strips so they cook at the same pace.
2 Heat the oven while you prep the breading
- Set your oven to 400°F 200°C so it reaches temperature by the time the tenders are ready to bake.
- A hot oven helps the breadcrumbs crisp quickly without drying the interior.
3 Set up the breading station
- In one bowl place the flour. In the second bowl beat the eggs. In the third bowl mix the breadcrumbs with the salt pepper garlic powder and paprika so every bite is seasoned.
4 Dredge and coat the chicken
- Dip each chicken strip first in flour then in eggs and finally press into the breadcrumb mixture until well coated.
- Work in batches if needed to avoid overcrowding the bowls.
5 Arrange on the baking sheet
- Place the coated chicken tenders on the prepared baking sheet leaving a little space between pieces so hot air can circulate.
6 Bake until golden and cooked through
- Bake for 20-25 minutes or until golden brown and the internal temperature reaches a safe level for poultry.
- If you like an extra crunch, turn on the broiler for a minute or two at the end but watch closely.
7 Serve warm with sauces or sides
- Plate the tenders straight from the oven and offer dipping sauces for a fun family style meal.
Ingredients
- 1 pound chicken breast, cut into strips
- 1 cup breadcrumbs
- 1/2 cup flour
- 2 eggs
- 1 teaspoon salt
- 1/2 teaspoon pepper
- 1 teaspoon garlic powder
- 1 teaspoon paprika
Directions
1 Preheat your oven to 400°F (200°C).
2 Prepare a baking sheet with parchment paper.
3 Set up your breading station with three bowls one for flour one for beaten eggs and one for breadcrumbs mixed with spices.
4 Dip each chicken strip in flour then in eggs and finally coat with breadcrumbs.
5 Place the coated chicken tenders on the baking sheet.
6 Bake for 20-25 minutes or until golden brown and cooked through.
7 Serve hot with your favorite dipping sauce.
How to Store Crispy Oven Chicken Tenders
- Refrigerate in an airtight container for 3–4 days at 40°F 4°C for best quality.
- Freeze for up to 2 months at 0°F −18°C; wrap pieces individually in plastic wrap then place in a freezer bag to prevent freezer burn.
- To reheat from the refrigerator place on a baking sheet and bake at 350°F 175°C for 10–12 minutes to crisp.
- To reheat from frozen bake at 375°F 190°C for 20–25 minutes or until heated through and crisp.
- Do not leave cooked tenders at room temperature over two hours to avoid food safety issues.
Serving Suggestions for Crispy Oven Chicken Tenders
These tenders are incredibly versatile which makes them perfect for many occasions. Serve them as the main attraction alongside simple sides such as roasted vegetables mashed potatoes or a refreshing salad. For a casual party or game day spread, arrange them on a platter with different dipping sauces like honey mustard barbecue ranch or a spicy sriracha mayo so guests can choose.
If you want to pack lunches, let tenders cool and tuck them into wraps with crunchy slaw and pickles or slice and add to grain bowls over quinoa with avocado and a drizzle of lemon vinaigrette. For a fun twist try serving them in slider buns with coleslaw and dill pickles for mini sandwiches that both kids and adults will love.
Pro tip: a squeeze of fresh lemon over the hot tenders brightens the flavors and cuts through richness without adding anything complicated.
Tips to Make Crispy Oven Chicken Tenders
Q How do I keep the tenders moist
A Ensure strips are uniform in thickness and do not overbake. Use a meat thermometer to check that the internal temperature reaches 165°F 74°C then remove from oven promptly.
Q What breadcrumb is best
A Panko gives an airier crunch while regular breadcrumbs provide a denser coating. Both work fine; adjust baking time if your crumbs are very coarse.
Q Can I make breading ahead
A Yes you can bread the tenders and arrange them on a tray covered in plastic wrap then refrigerate for up to one day before baking.
Variations and Substitutions
-
Gluten free option
Swap the flour and breadcrumbs for a gluten free flour blend and gluten free panko or crushed rice crackers. The process stays the same and results remain delightfully crisp. -
Different spice profiles
For a smokier edge increase the paprika and add a pinch of cumin. For heat incorporate cayenne or chili powder. For an herby profile add dried oregano and thyme to the breadcrumbs.
Common Mistakes to Avoid
-
Crowding the baking sheet
If tenders touch they steam instead of crisping. Use two sheets if necessary or bake in batches. -
Not seasoning each component
Seasoning only the chicken and not the crumbs leads to bland coating. Mix salt and spices into the breadcrumbs so flavor is distributed evenly. -
Rushing oven temperature
Start with a fully preheated oven for proper browning. A lukewarm oven yields pale tender shells.
Why these tenders deliver nine clear reasons you will keep making them
1 Time friendly
From fridge to fork in about 30 minutes from start to finish makes this recipe ideal for weeknights.
2 Faux fried satisfaction
Baked tenders deliver the look and crunch you crave from fried food without the large amount of oil.
3 Family friendly appeal
Small hands and picky eaters tend to love simple seasoned crunch. You can hide extra vegetables in a slaw or in sides if needed.
4 Adaptable seasoning
The basic mix is a canvas. Shift spices to suit global flavors or to match a sauce you love.
5 Pantry friendly
The ingredients are stable and likely already present in many kitchens which reduces grocery stress.
6 Portable and shareable
They travel well for lunchboxes picnics or potlucks and maintain texture when paired with appropriate sauces.
7 Great for batch cooking
Make a double batch and freeze some for ready meals later. Reheat in the oven for best results.
8 Healthier than deep frying
Without sitting in oil these maintain a lower overall fat content while still offering satisfying texture and taste.
9 Crowd pleaser
Whether guests are young or old, these are almost universally popular and pair well with many sides and dips.
Small ways to elevate the basic recipe
- Add a little grated Parmesan to the breadcrumbs for a savory umami lift.
- Mix chopped fresh parsley into the crumb mixture for color and freshness.
- Brush tenders lightly with olive oil or melted butter before baking to promote deeper browning.
Make ahead strategies and freezing tips
If you plan to prep ahead for a busy week assemble the tenders through the breading step then freeze them uncooked on a tray until firm. Transfer to a freezer bag and bake straight from frozen adding a few extra minutes to the bake time. This preserves the freshly breaded texture and eliminates last minute prep.
A note on temperature and safety
Always ensure chicken is cooked to a minimum internal temperature of 165°F 74°C. Use a quick read thermometer inserted in the thickest part of a tender to verify doneness. While visual cues like golden color are helpful they do not replace temperature checks for safety.
How to achieve a crunchier exterior
- Use panko crumbs for larger flakes that create more surface area and crispiness.
- Lightly spray breadcrumbs with oil or toss them with a little olive oil before breading to encourage browning.
- After baking for most of the time switch to broil for one to two minutes to puff and brown the crumb layer but remain vigilant to avoid burning.
Serving idea combinations to try
-
Southern style platter
Serve with coleslaw biscuits and a small bowl of honey butter for a homey southern experience. -
Mediterranean bowl
Serve sliced tenders over a bed of arugula with cucumber tomatoes olives and tzatziki for a lighter meal. -
Crunchy taco twist
Chop tenders and fill warm tortillas with shredded cabbage chipotle crema and cilantro for crunchy tacos. -
Kid friendly dipping party
Set out bowls of ketchup honey mustard barbecue and ranch for a customizable dipping station that makes dinner interactive.
Recipe scaling and portioning
This recipe scales easily. Multiply the ingredients as needed and bread in batches to avoid a wet flour bowl. For parties double or triple the components and keep baked tenders warm in a low oven while you finish batches.
Technical variations for texture
For an ultra crispy coating combine panko with crushed cornflakes for an extra crunch. Alternatively use ground nuts such as almonds or pecans for a nutty textured crust but be mindful of allergies.
Quick side recipes to pair
-
Simple roasted broccoli
Toss broccoli florets with olive oil salt and pepper roast at 425°F 220°C for about 15 minutes until edges caramelize. -
5 minute garlic green beans
Sauté green beans in olive oil with a smashed garlic clove for a quick green side. -
Classic mashed potatoes
Creamy mashed potatoes are the ultimate comfort side for these tenders and can be made ahead and reheated.
Nutritional considerations
While oven baked tenders are lighter than their deep fried counterparts remember that calorie totals vary with portion size and any added fats. Using lean chicken breast keeps protein high and fat moderate. Serving with vegetable sides and whole grain options helps balance the meal.
A short troubleshooting corner
If your crumbs seem soggy after baking consider these possibilities
- The crumbs were too wet when applied due to excess egg. Pat chicken slightly before dipping in crumbs.
- The oven temperature was low. Confirm with an oven thermometer.
- The baking sheet was overcrowded. Spread pieces out to allow air flow.
Internal link for further inspiration and crispy poultry ideas
If you enjoy oven baked options and want to explore more ways to get a crunchy roast try this guide to baked chicken thigh recipes which offers techniques that translate well to tenders.
FAQs
What is the best way to reheat leftover tenders
Reheat in an oven at 350°F 175°C for 8–12 minutes to restore crispiness. A toaster oven also works well for single portions.
Can I use chicken thighs instead of breasts
Yes chicken thighs are flavorful and stay juicy but adjust cooking time since thighs are often thicker. Aim for the same safe internal temperature.
How do I make the tenders spicier
Mix cayenne chili powder or hot paprika into the breadcrumb mixture. Serve with a spicy dipping sauce for an extra kick.
Are these safe to eat the next day
Yes store in an airtight container in the refrigerator and consume within 3–4 days.
What dips pair best with these tenders
- Honey mustard
- Barbecue sauce
- Ranch
- Spicy mayo
You can also make a yogurt based herb dip for a lighter option.
What if I do not have a thermometer
Cook until juices run clear and the smallest piece measures firm when pressed but keep in mind a thermometer is the most reliable method.
Conclusion
These tenders strike a balance between simplicity and delight which is why they become a go to dish. If you want to experiment with a gluten free buffalo style finger that stays crispy and flavorful check this recipe for Crispy Buffalo Chicken Fingers (Gluten-Free) – Steph Gaudreau for ideas on alternative coatings and sauces that pair beautifully with oven baked chicken.
Enjoy the satisfying crunch and easy prep of these tenders and remember the small tweaks listed here are all you need to make them your own.
Print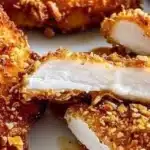
Crispy Oven Chicken Tenders
- Total Time: 40 minutes
- Yield: 4 servings
- Diet: Gluten-Free option available
Description
Golden, crunchy chicken tenders that are easy to bake and perfect for weeknight dinners.
Ingredients
- 1 pound chicken breast, cut into strips
- 1 cup breadcrumbs
- 1/2 cup flour
- 2 eggs
- 1 teaspoon salt
- 1/2 teaspoon pepper
- 1 teaspoon garlic powder
- 1 teaspoon paprika
Instructions
- Preheat your oven to 400°F (200°C).
- Prepare a baking sheet with parchment paper.
- Set up your breading station with three bowls: one for flour, one for beaten eggs, and one for breadcrumbs mixed with spices.
- Dip each chicken strip in flour, then in eggs, and finally coat with breadcrumbs.
- Place the coated chicken tenders on the baking sheet.
- Bake for 20-25 minutes or until golden brown and cooked through.
- Serve hot with your favorite dipping sauce.
Notes
Make sure to not overcrowd the baking sheet to ensure the tenders crisp up nicely.
- Prep Time: 15 minutes
- Cook Time: 25 minutes
- Category: Main Course
- Method: Baking
- Cuisine: American