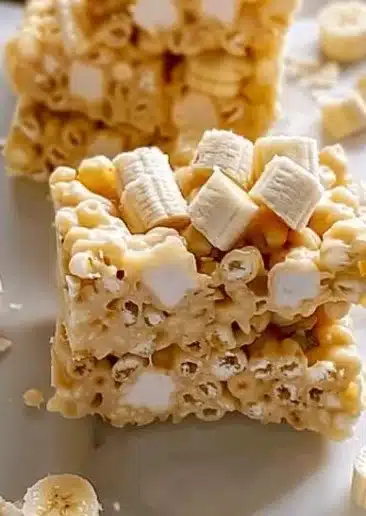
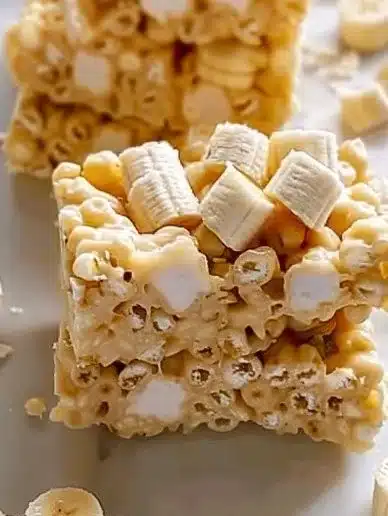
Banana Pudding Rice Krispie Treats
Banana Pudding Bliss
So you’re craving something tasty but too lazy to spend forever in the kitchen, huh? Same. Who even has the time to whip up a gourmet dessert when you could be binge-watching your favorite show? Enter Banana Pudding Rice Krispie Treats. Yup, these little bites will change your dessert game forever. They taste like a hug wrapped in nostalgia, and you can whip them up faster than you can scroll through Instagram.
Why This Recipe is Awesome
Alright, let’s spill the tea on why this recipe is fantastic. First off, it’s idiot-proof. Seriously, if I can do it, anyone can. You don’t need any fancy culinary skills or a million pots and pans to tackle this dessert. Plus, it pretty much requires zero clean-up—just one pot and a pan to grease. And did I mention that it combines two beloved treats? Rice Krispie treats and banana pudding in one bite? What’s not to love?
The best part is that they’re fun to make and even more fun to eat. Sharing is caring, but let’s be real—you might not want to share these treats. Who can blame you? They are the irresistible little gems that just go straight to your happy place.
Ingredients You’ll Need
Here’s what you’ll be tossing into your pot like a culinary wizard. Grab your shopping list and get ready to mix things up.
- 4 cups Rice Krispies cereal: Because life is too short for soggy cereal.
- 1 cup mini marshmallows: The cute little squishy guys that make everything better.
- 1/2 cup unsalted butter: Because we’re not trying to add extra salt to our dessert drama.
- 1 package (3.4 oz) instant banana pudding mix: The secret to banana-flavored bliss.
- 2 cups milk: Milk does the body good and makes this treat creamy.
- 1 teaspoon vanilla extract: Because vanilla is like the best friend of flavors.
- 1/2 cup sliced bananas: Fresh fruit, sweet and nutritious—or so we’ll tell ourselves.
Step-by-Step Instructions
Ready to dive into this treat-making journey? Grab that butter and let’s get it melting!
- Melt the butter in a large pot over low heat. Keep an eye on it though, we’re not looking for molten lava here.
- Add the mini marshmallows and stir until they melt completely. This is where the magic happens.
- Remove from heat and stir in the banana pudding mix, milk, and vanilla extract. Mix it up until you’ve got a creamy, dreamy concoction.
- Fold in the Rice Krispies until they are well coated. Don’t be shy—give it a good mix like you’re conducting an orchestra of deliciousness.
- Gently mix in the sliced bananas. You want those banana chunks to be everywhere, just like your favorite songs on repeat.
- Press the mixture into a greased 9×13-inch pan. Use your hands or a spatula, but don’t go all Hulk on it.
- Let it cool before cutting into squares. This is more like a waiting game, but the results are oh-so-worth it!
Common Mistakes to Avoid
So you think you can just wing it? Cool, but here are some rookie mistakes to dodge like a pro.
- Not greasing the pan: Trust me; you do not want your treats to turn into a stuck-on disaster.
- Using margarine instead of butter: I mean, you can, but why would you? Seriously, sacrifice a little for the creamy goodness of butter.
- Being a heavy hand with the bananas: If you use too many, you might as well call it banana goo and skip the dessert part. Balance is key.
- Not letting it cool: This is where the waiting game comes in. Cutting into it too soon makes for messy treats. Patience, my friend.
Alternatives & Substitutions
Let’s chat about alternatives because sometimes you don’t have everything on hand and that’s okay!
- Cereal swap: If you’re feeling adventurous, you could use a different kind of cereal like Fruity Pebbles or Cocoa Krispies. Just ask yourself if you can handle the color explosion or chocolate madness.
- Milk options: Almond milk or oat milk work just as well. Go wild.
- Pudding swap: Not a banana fan? Try chocolate pudding instead. Instant dessert satisfaction guaranteed.
My motto is to keep it flexible. Cooking should be fun, not stressful, so don’t sweat the small stuff!
FAQ (Frequently Asked Questions)
How long do these treats last?
Well, if they make it past day two, consider yourself lucky. They should hang in there for about a week in an airtight container.
Can I make these ahead of time?
Absolutely! Go ahead and make these the night before. You will impress your friends and feel like a top chef.
Can I use margarine instead of butter?
Technically, yes. But do you really want to downgrade your dessert experience like that?
Can I add nuts?
Sure! If you’re into that crunch factor, toss in some chopped walnuts or pecans for a little extra flair.
What’s the best way to store these?
Keep them in an airtight container at room temperature. Trust me; that’s the best way to keep the crispy goodness intact.

Final Thoughts
Now go impress someone—or yourself—with your new culinary skills. You’ve earned it. And remember, these Banana Pudding Rice Krispie Treats aren’t just desserts. They are blissful bites of nostalgia that bring a sweet smile to your face.
So next time you’re looking for an easy, fun treat, remember this easy peasy recipe. Grab a plate, dig in, and whatever you do, don’t forget to share… or do.
Print
Banana Pudding Bliss
- Total Time: 25 minutes
- Yield: 12 servings
- Diet: Vegetarian
Description
Delicious Banana Pudding Rice Krispie Treats mix two beloved treats into irresistible bites, perfect for a quick and easy dessert.
Ingredients
- 4 cups Rice Krispies cereal
- 1 cup mini marshmallows
- 1/2 cup unsalted butter
- 1 package (3.4 oz) instant banana pudding mix
- 2 cups milk
- 1 teaspoon vanilla extract
- 1/2 cup sliced bananas
Instructions
- Melt the butter in a large pot over low heat.
- Add the mini marshmallows and stir until melted completely.
- Remove from heat and stir in the banana pudding mix, milk, and vanilla extract until creamy.
- Fold in the Rice Krispies until well coated.
- Gently mix in the sliced bananas.
- Press the mixture into a greased 9×13 inch pan.
- Let it cool before cutting into squares.
Notes
Make sure to grease the pan to avoid sticking. These treats can last about a week in an airtight container.
- Prep Time: 15 minutes
- Cook Time: 10 minutes
- Category: Dessert
- Method: No-Bake
- Cuisine: American